Thursday, August 30, 2018

7 Pro Tips for Adding Curb Appeal to Your House

7 Pro Tips for Adding Curb Appeal to Your House

You don't have to be an exterior designer to spruce up the appearance of your home. The pros know how to add curb appeal with minimal effort. You might be surprised to know that in the space of a few hours you can completely change how others see your property. Here are seven pro tips for adding curb appeal to your house.

1. Take a Walk in a Buyer's Shoes

All good projects begin with assessment. The old adage tells us that well begun is half done, so start by taking a critical look at your home. Look at the exterior through the eyes of a prospective buyer. You'll want to carry a notepad so you can jot down the things you see.
You will be surprised at the number of little things you can fix immediately. House numbers that are missing or falling down. Windows that need to be cleaned and siding that needs to be power washed. Loose gutters. Tackling all of the little stuff can usually be accomplished in a single afternoon, and you probably already have everything you need for quick fixes.

2. Start With the Entryway

Doors are a focal point for the eye. They get immediate attention. Furthermore, the condition of your front door makes an instant psychological connection with the condition of your property as a whole. If your entryway is warm and welcoming, visitors and potential buyers will project that same vibe toward the rest of your property.
A little paint and some TLC is all you need to make your door great again. Best of all, you can achieve this fix for less than $100 and a few hours of your time. Be sure to give attention to the areas around the door as well, replacing or cleaning light fixtures as needed.

3. Add Some Window Boxes

This pro tip should really be at the top of the list. Window flower boxes are both economical and attractive. PVC is the preferred material here because it is so versatile. You can paint it any color you choose, and PVC won't rot or crack in extreme temperatures.
We're talking a single day at most to install and plant your window boxes. Remember to choose a mix of trailing and climbing plants to spread among those glorious color varieties. Prepare to receive lots of compliments from your neighbors. It's that simple.

4. Consider New Shutters

Now that you've made the windows of your home a focal point, it's time to add some new shutters. Custom exterior shutters are more affordable than you might think, and they are easy to install. The best shutters are made from Versatex and will not deteriorate or warp.
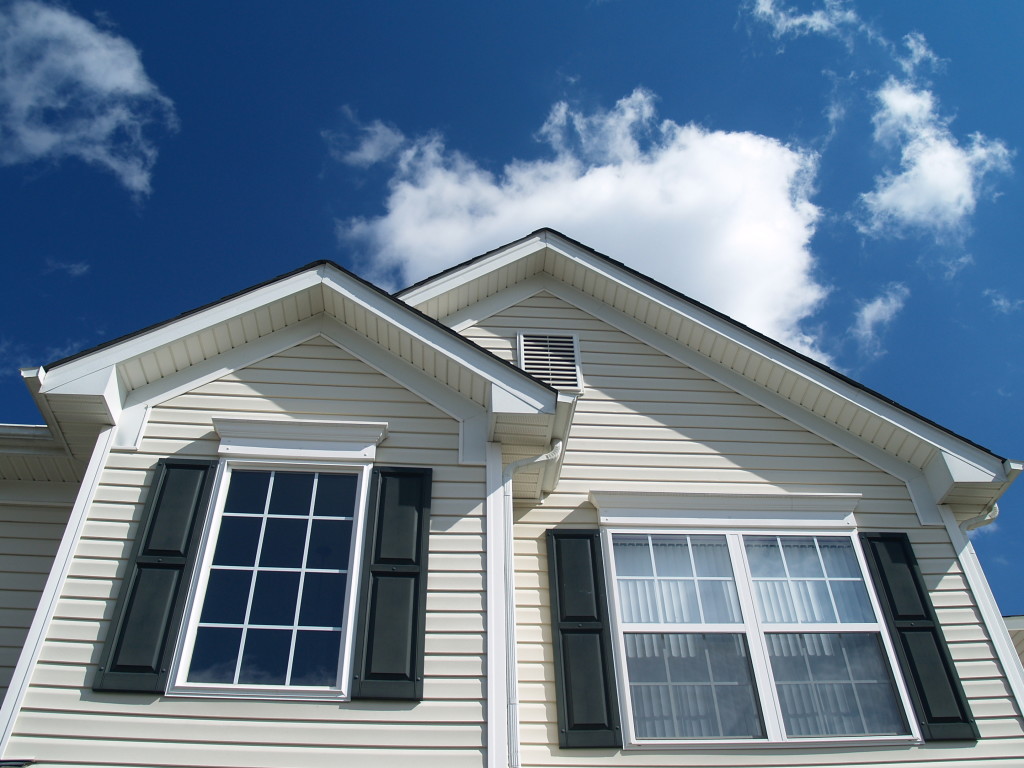
You can choose from raised panels, louvers or traditional wainscot styles. Many paint options are available, and the shutters are not hard to install. Shutters are one of the few things that can radically alter the curb appeal of your home. It's all about giving the eye something pleasant to behold.

5. Use Planters Creatively

Everyone knows that nice outdoor planters are an easy way to incorporate greenery into your landscaping. The trick is to use these planters creatively. You want to aim for symmetry with your PVC planters. Use them on either side of steps, along the walkways leading up to your home and as accessories for outdoor sitting areas.
You can choose from a large number of styles when it comes to planters. The best thing about PVC is that it is guaranteed for life and will not rot or decay. It can also be painted with ease, and taking care of the plants it holds is super simple when you choose a self-watering planter.

6. Ask for Input From Others

We all want to believe our home is the nicest one on the block. It will serve you well to release a little bit of pride and ask your family or neighbors to give you some critical input. It's too easy for you to miss things. A fresh set of eyes can reveal areas that need attention.
Pay attention to the first thing your visitors look at. Guess what? That's where people are looking first when they pass by. Make sure you give these areas extra care. Don't be offended when others give you pointers. Look at their suggestions as a great opportunity to improve curb appeal.

7. Get Seasonal

One of the best things you can do to boost curb appeal is to get in tune with the rhythm of the year. Adding a few seasonal decorations will direct attention to the fabulous exterior you have created.
The important thing here is not to overdo it. A little seasonal decoration goes a long way. Don't forget to take down those seasonal accessories in a timely manner, too. You don't want pumpkins on the porch after Thanksgiving, and leaving up the Christmas lights year-round is a big no-no.
See? That wasn't so hard, was it? You can implement all of these pro tips in a single week, and you won't break the bank in the process.

Author Bio

Matt Buquoi works at FlowerWindowBoxes.com, a company that offers premium-quality, no-rot flower window boxes and outdoor planters at affordable prices.

Tuesday, June 20, 2017

Important Tips for Building your Front Yard Garden


When it comes to landscaping, there is nothing more important than building a front yard garden. Whether it is free floating, or attached to the front of your house, it does a great job of adding character to your home, and it can even raise the value of your property significantly. Just remember that there are several items you’re going to need to get started, and it’s not as simple as just planting things; you need to create a structure, and you need to do a good job of it. With that being said, we’re going to discuss a few items that you’ll be needing to get off to a good start.

Your Front Garden Checklist

Before you get started with your building, you’re going to need to make sure that you have these very important items.
  • Planting Soil
  • Tarps(any color, enough to cover the bottom of the garden)
  • Drainage System
  • Mulch
  • Plants
  • Stones (We’ll get to that later)
  • Pea Gravel
  • Concrete Mix
  • Wheelbarrow
You'll also need to ensure that your yard is free of unnecessary trees.
These, along with your landscaping tools should be adequate for you to get started, and to commence the building of your garden, we’re going to recommend building a flagstone wall.

Building a Flagstone Wall


Do you remember the tarps we told you to buy? These serve a very important purpose as you will lay them down where you plan to lay your planting soil and mulch. The idea behind it is to keep water inside, ensuring that it does not seep into the ground beneath your flagstone wall and cause it to deform or crack. If you take a look at nearly any improperly built flagstone wall, one of the things you will notice is a series of cracks which are caused by erosion or deforming of the wall over time. Using a tarp will help to prevent some of that.

Laying your Foundation
Once you have laid the tarp, you will want to create a level surface around the edge of it using the pea gravel. This will give your stones somewhere to sit and ensure that once again, they aren’t buckling or becoming deformed. Dig a shallow trench and fill it with the pea gravel to create that level surface! Once you’ve laid your foundation, you’ll be ready to move on to the most important part.

Install Your Drainage System
Your garden will need a drainage system, and while you can buy pre-made ones from your local lawn and garden store, many people simply use PVP pipes with drilled holes, leading through the flagstone wall and exiting onto the front lawn. If you happen to have a drainage system for your yard, then this will work nicely.

Mix your Concrete
Using the wheelbarrow as a mixer, go ahead and create the concrete, as much as you need for the job that you are about to undertake. Once you have mixed it, you’ll be ready to start laying your flagstone wall.

Build Your Wall
Go ahead and use your stones to build the wall, choosing the prettiest ones for the top. Between each layer of stone, put down a layer of concrete, allowing each layer of stone to set into it. Ideally you would only need 1-2 bags of concrete, but it all depends on the size and scope of the project.

Plant your Garden
Give the concrete a night to dry, and then feel free to start dumping your planting soil in. Once it’s filled completely, go ahead and plant your flowers, trees, and any other green life you want to see sprout in front of your house. Once everything is planted, lay your mulch and enjoy!

All in all, depending on the size of your home and your project, you’ll pay about $300-$400 for this project, but it can run a bit more expensive. Still, once you’re done, you’re going to have a completely amazing garden, and one that you can enjoy for many years to come!

More info:
https://lawntoolslist.com/best-self-propelled-lawn-mower-reviews/


Monday, May 01, 2017

Dont kill your Garden with Water Damage

If you are living in Dallas Texas, then you must have a beautiful garden inside the boundaries of your house or outside, next to the footpath. A house with a small and beautiful garden does not only enhance the beauty of the house but also increase the value of the property. Taking care of house's garden in any part of the world is not easy but when it comes to Dallas Texas, then you have to do extra care. The weather of Dallas gets very messy in summer. Almost the citizens living in the Dallas face the flood, storm and heavy rain each year due to which it’s become difficult for them to keep their garden beautiful and attractive.

Every year, hundreds and thousands of garden get damages in Dallas due to the heavy rains and flood. These type of damages are included in the list of water damage. That's why the most of the insurance companies who offer water damage claims for other parts of the house, also offer claim for the garden which got damaged by the water. Same like that water damage restoration Dallas Texas, the company who provide water restoration services for different parts of the rooms, also offer restoration services for the garden damages caused by the water.

Water damage restoration services for gardens are different. In this services the company does not help out to dry the water from the garden because it gets dry automatically within time once the sun appears in the sky. In this service, the main aim of the company is to protect the other part of the house which is near to the garden and also the pipelines of the house which usually pass out from the garden due to sewerage and water system.

The standing water in the garden can bring more water damages inside the house and also help them to spread the illness. Because mold starts growing on and near the wet place. Although, if the water does not get dried on the time from the garden then it can help many insects to grow which causes more mess inside the house.

So, if you are living in Dallas, Texas and have a garden in your house or outside, then you must inspect your garden and nearby area, right after a heavy rain. This will help you to analysis about the water damage and how much attention you need to give to your garden in the water restoration process.

The professional and reputed water damage restoration company know that how important it is to inspect the garden (does not matter that whether its big garden or small) during the water restoration process. Usually, the garden does not bring or aid in water damage but taking care of your garden in an aim to protect yourself and your house from water damage is important. As a small leakage of water from the garden can bring big damages and you have to pay lumps some amount for the restoration purpose.

Monday, January 30, 2017

Jokes for Gardeners Found on Twitter: "Life's a garden - dig it" and 6 Others That Will Make You Smile

Friday, March 28, 2014

How to Prune a Tree

It is important for homeowner gardeners to know how to prune trees. Tree pruning is meant to remove unwanted branches. This process is done carefully in order to avoid the destruction of the tree's trunk. The skillful gardener should prune right from the trunk-branch nodes. They should ensure that all pruning cut starts should be conducted on the stem collar.


Pruning from the stem collar is important because it protects growing stems and branches that are not supposed to be cut. Similarly, this will give the tree a chance to regain its shape after trimming the unwanted branches. The gardener should pay close attention when pruning large branches so that they protect the destruction of the bark and wood of the stem.

The following step by step procedure is quite useful if one intends to prune trees:

First and foremost, locate where the underside of the stem collar is found. Then, craft a tiny wedge-shaped cut directly on the underside of the branch of the tree. This small cut ensures that the bark is broken loose at that position in order to prevent a tear from penetrating to the stem tissue.

Second, cut all the way via the whole branch. Make sure that you leave on a stub end. This step should start from the topmost part of the branch. It is a procedural step that enables one to cut the branch cautiously to avoid destroying the tissue cells of the tree. The tissue is needed in the growth of new cells.

Third, the gardener should make another cut parallel to and directly on the stem branch side of the collar of the trunk. This intended to minimize the length of stub to a large extent.

In the case of a large branch and stem, a drop crotch cut is made. The above procedure is also applied in this scenario. The first notch cut is made on the underpart of the branch you are pruning. The second cut is made through the branch from the interior of part of the crotch up from the edge the bark of the two branches being pruned. The final step involves making a third cut at one part of the branch bark ridge and approximately parallel to it. This is meant to shorten the remaining stub.

The best time for tree pruning is during the dormant season or winter. This period will minimize sap loss and fungus infection to the tree. However, dead branches can be removed at any given moment.

Wednesday, October 23, 2013

Sigh. We've all been there.


Haven't we?

Tuesday, October 28, 2008

Lessons Children Can Learn Out of Gardening

By Roger Peter

Submitted via our Submit An Article page.


My children enjoy working in the garden. They like to plant seeds and then watch them grow into sunflowers, tomatoes, peaches, and even pears. It is something they have grown up with. They watched their grandfather plant his vegetable garden and their grandmother her flowers and when they were old enough, they were allowed to help. They enjoy seeing the fruits of their labor and eating the delicious fruit grown on the trees on the family farm.

Understanding Responsibility

It’s important that children are allowed to help in the garden for a number of reasons and even the smallest child should be included. Younger children can help dig holes, place seeds in the ground, and then help cover them up. Older children can help fill a watering can and then gently sprinkle the newly planted seeds to help them begin to grow. Make sure you label what you just planted so you don’t forget what’s growing. Once your seeds start to sprout show your children how to weed around the plants. Explain to them that some plants don’t belong in a garden and that it’s important to remove them so their flowers grow up healthy and strong. Teach your children responsibility as they continue to care for their plants and flowers. Make sure they keep them watered.

Connecting With Nature

Second, children will learn to connect with nature. Even if you don’t have a large amount of space you can still plant lettuce and tomatoes in pots on your porch. Show them where food begins. Explain to them that when a farmer plants a seed, it produces many of the foods they eat. Every child should know that meat is not born from a container at the grocery store or that milk doesn’t come from a bottle on the shelf. This is especially important if you are living in an urban area that doesn’t contain a lot of green space.

Many types of garden plants and flowers will attract birds and butterflies to your garden. Hummingbirds are drawn to any type of tubular flower but especially those that are red in color. Monarch butterflies feed exclusively on milkweed so planting this is sure to attract them as they travel on their migratory path. Your local garden shop can certainly give advice on which native plants to plant in your area.

Learning about the Circle of Life

Children will also learn that life has a cycle. They will see that from seeds come flowers and that after those flowers bloom they will turn brown, wilt and then die. It’s a lesson we all learn in time but when you teach it with beautiful flowers, the lesson doesn’t seem quite so harsh.

A lot can be learned when you put a rake or a shovel in the hands of a child. Hand powered garden tools and supplies for children can be purchased at any hardware store.

There are so many more things that children can learn out of gardening. Like learning to protect nature, nurturing, appreciation for beauty and understanding of & respect for the circle of life. These important lessons cannot be learned by sitting in front of television or the computer. So if you have not already done so, take the initiative and start giving your children some handy gardening lessons.

Sunday, December 31, 2006

Mail Order Plants


Many people order their seeds from catalogs because they cannot find the types of seeds they need in their local area. If you are thinking of ordering your seeds from a catalog this year, then you should plan now to start getting the right ones ordered.

Step one is to order the catalogs you want. Check online for lists of gardening catalogs or ask your gardening friends. You also can look in gardening magazines for advertisements. Although there are scores of catalogs available, you should order only the ones that you think may be of interest. If you live in the Pacific Northwest, then Awesome Tropical Seeds will not do you any good. Stay away; it only will serve to give you too many choices.

Once the catalog arrives, you will need to pick out the plants. Now you probably will notice that these plants are fairly pricy. That is because they are special-order plants. You are paying for the fact that they are not in your local area and for the additional care that must be taken in shipping these plants. Still you can rest assured that the plants you order through the mail are well taken care of, so you do not need to worry about their quality as much as if you were purchasing cheap from a retailer.

When the plants arrive, you will need to take care to open them and get them started growing immediately. You should look at the amount of time the plants take to ship so that you can try to time your order with the time you will be able to plant the seeds or seedlings that you have ordered. If you end up with the plants too early, then you will need to purchase containers to put them in before you even open the box. Remember that the plants are very delicate but are protected while they are in the box. Keep them that way until you are ready to move them. This prep time should not take more than a day or so, however, as the plants are not intended to survive in the box for long.

When you are ready, remove the lid from the box carefully. A leaf or two may fall out, but the bulk of the plant should remain intact. In fact, you should find that each plant is in a separate container or hole in the box and that the plants all have labels on them. If they do not have labels, after saying mean things about the seed company, you should get a catalog and compare the pictures with your invoice. Make sure that you can tell what each plant is before getting it out. Otherwise call the customer service line for the catalog company to ask for help.

The plant most likely will have a little tag with the name. If you are getting tiny rooted plants, then you should be able to tuck the tag underneath the plant. That will work best for getting each plant out, so try to find a way to get the tag underneath the plant roots quickly. They will hold the roots and compost together while you are in the process of transferring the plants.

Next you will need to put the plant in its home, whether that is your yard or a small plant in your home. If you will be moving the plant again, be careful that you will be able to transplant it. Otherwise you should be good to go once you get the plant in its new home. Put some fertilizer or compost in with the plant and water it. Remove any dead or dying leaves now so that they do not contaminate the remainder of the plant.

Now you can sit back and enjoy. Be sure that you mark which companies sent great seeds and seedlings and which did not. You will want to know where you got the plants next year so that you can order from the same companies again and avoid the ones with less flattering plants. You will need to begin ordering new catalogs each year so that you can plan for your seeds and seedlings each winter.